Oracle Technologies: Oracle Order Management DropShip Flow for R12
In this blog I will explain Oracle Drop Ship Flow for R12i.
What is Dropship Order - In dropship Order, sales order line creates a requisition line that becomes a PO and sent to your supplier. You instruct your supplier to send the item or configured item directly to your customer only and items never physically pass through your warehouse, and therefore you do not pick, pack or ship them yourselves
In this blog I will explain the R12 Dataflow of Dropship order from OM to Oracle Payables.
Topics covered in this blog are
Drop Ship Sales order creation and booking.
Requisition Import
Auto Creation of PO
Receipt against PO
AP against PO
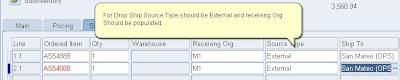
Since in Dropship we don’t receive the goods in our warehouse, SOURCE_TYPE will be “External”, where as for non-dropship orders it is Internal. Once Book, we cannot Changes SOURCE_TYPE.
We can change the SOURCE_TYPE as “External” for an item at the time of order creation, or we can define it permanently in the Item creation Setup, by setting Default SO Source Type = External.
Also as we don’t have any shipping activity in dropship orders, Receiving Transaction Processor (RTP) , triggered after Submitting the receipt will push the workflow from Shipping activity to Fulfillment.
R12 Dataflow of Dropship order from OM to Oracle Payables.
Step1 - Drop ship Sales Order Creation
Step2 - Source Type = External
Step3 -Once order is Book, order line workflow will be at Purchase release Deferred Status .
Step4 -Submit Workflow to progress the Order line workflow.

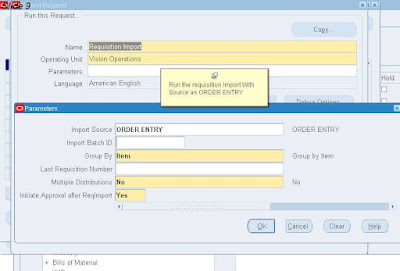
Step5 -Submit the requisition Import to create Requisition for Drop Ship
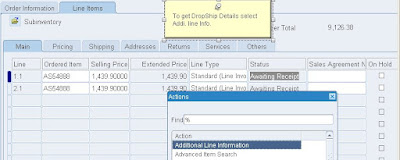
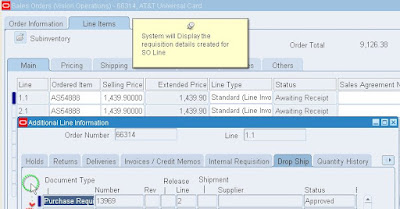
Step6 -Once requisition Import Completed successfully , Navigate to Order lines Action >Additional Information and then go to DropShip tab.
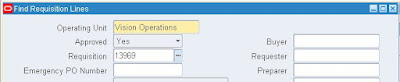
Step7 - Switch to Purchasing Responsibility and Navigate to Requisition Summary

Step8 -Query for Requisition Number

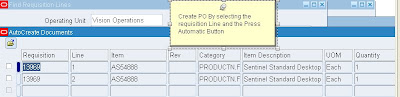
Step9 – Open the Auto Create Window and Query for Requisition #
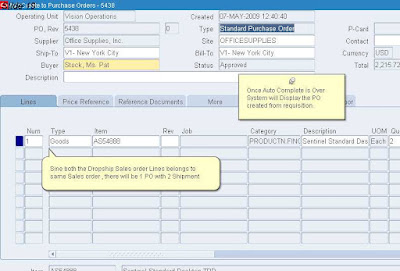
Step9 –Auto Create
Step10 -Approve the PO
Step11 - Browse the Shipment Details of PO , (Shipment Button)
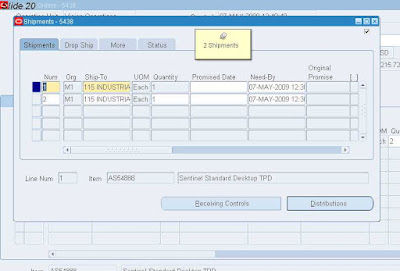
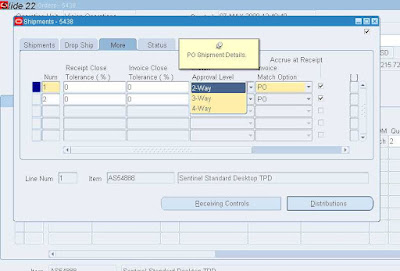
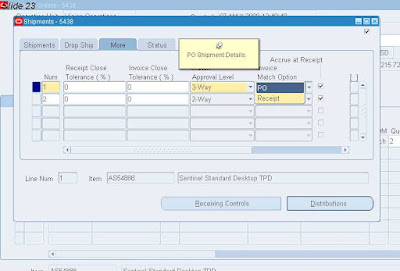
Step11 - Browse the Shipment Details of PO, (Shipment Button).We can select the Approval Level and Invoice Match Option based on your business requirements.
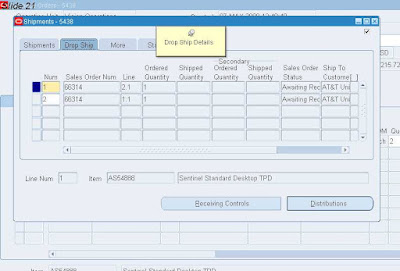
Step11 - Browse the Shipment Details of PO , (Shipment button).
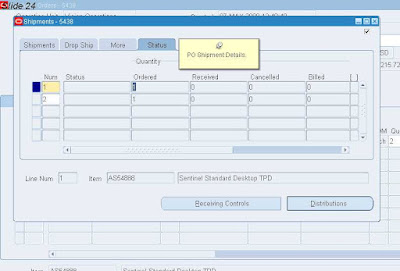
Step11 - Browse the Shipment Details of PO , (Shipment Button), it will display Qty Ordered/billed/shipped etc.
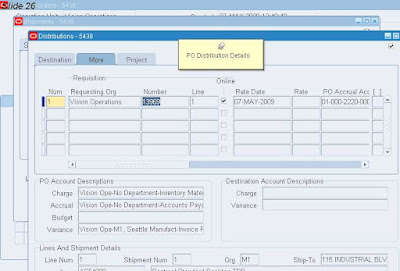
Step12 - Browse the Distribution Details of PO , (Distribution Button).

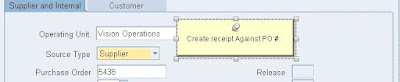
Step13 - Navigate to receipts.

Step13 - Navigate to Receipt , system will prompt for Inventory Org , Select your Inventory Organization.

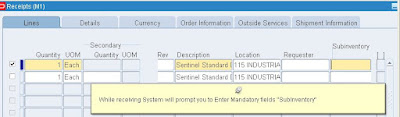
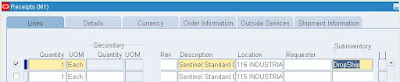
Step14 - Enter Receipt against PO.
Step14 -
Step14 -
Step15 - Once you save the Receipt , System will submit Receiving Transaction processor.

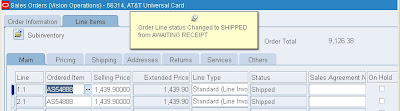
Step16 - RTP on successful completion Progress the OM Workflow and Line status change from Awaiting receipt to SHIPPED.
In this blog I will explain Oracle Drop Ship Flow for R12i.
What is Dropship Order - In dropship Order, sales order line creates a requisition line that becomes a PO and sent to your supplier. You instruct your supplier to send the item or configured item directly to your customer only and items never physically pass through your warehouse, and therefore you do not pick, pack or ship them yourselves
In this blog I will explain the R12 Dataflow of Dropship order from OM to Oracle Payables.
Topics covered in this blog are
Drop Ship Sales order creation and booking.
Requisition Import
Auto Creation of PO
Receipt against PO
AP against PO
Since in Dropship we don’t receive the goods in our warehouse, SOURCE_TYPE will be “External”, where as for non-dropship orders it is Internal. Once Book, we cannot Changes SOURCE_TYPE.
We can change the SOURCE_TYPE as “External” for an item at the time of order creation, or we can define it permanently in the Item creation Setup, by setting Default SO Source Type = External.
Also as we don’t have any shipping activity in dropship orders, Receiving Transaction Processor (RTP) , triggered after Submitting the receipt will push the workflow from Shipping activity to Fulfillment.
R12 Dataflow of Dropship order from OM to Oracle Payables.
Step1 - Drop ship Sales Order Creation
Step2 - Source Type = External

Step3 -Once order is Book, order line workflow will be at Purchase release Deferred Status .
Step4 -Submit Workflow to progress the Order line workflow.

Step5 -Submit the requisition Import to create Requisition for Drop Ship

Step6 -Once requisition Import Completed successfully , Navigate to Order lines Action >Additional Information and then go to DropShip tab.


Step7 - Switch to Purchasing Responsibility and Navigate to Requisition Summary

Step8 -Query for Requisition Number

Step9 – Open the Auto Create Window and Query for Requisition #

Step9 –Auto Create

Step10 -Approve the PO

Step11 - Browse the Shipment Details of PO , (Shipment Button)

Step11 - Browse the Shipment Details of PO, (Shipment Button).We can select the Approval Level and Invoice Match Option based on your business requirements.

Step11 - Browse the Shipment Details of PO , (Shipment button).

Step11 - Browse the Shipment Details of PO , (Shipment Button), it will display Qty Ordered/billed/shipped etc.


Step12 - Browse the Distribution Details of PO , (Distribution Button).


Step13 - Navigate to receipts.

Step13 - Navigate to Receipt , system will prompt for Inventory Org , Select your Inventory Organization.

Step14 - Enter Receipt against PO.

Step14 -

Step14 -

Step15 - Once you save the Receipt , System will submit Receiving Transaction processor.

Step16 - RTP on successful completion Progress the OM Workflow and Line status change from Awaiting receipt to SHIPPED.

